The Lightroom Graduated Filter Tool
The graduated filter tool is the third local adjustment tool covered in this Lightroom series. Its purpose is to apply a range of effects on a controlled section of photos, done, as the name implies, in a gradual manner. Effects graduation takes place in a linear fashion; we can easily control its direction, area of diminution and line of termination. It might sound complicated, but in reality, it is a simple and fun tool to use.
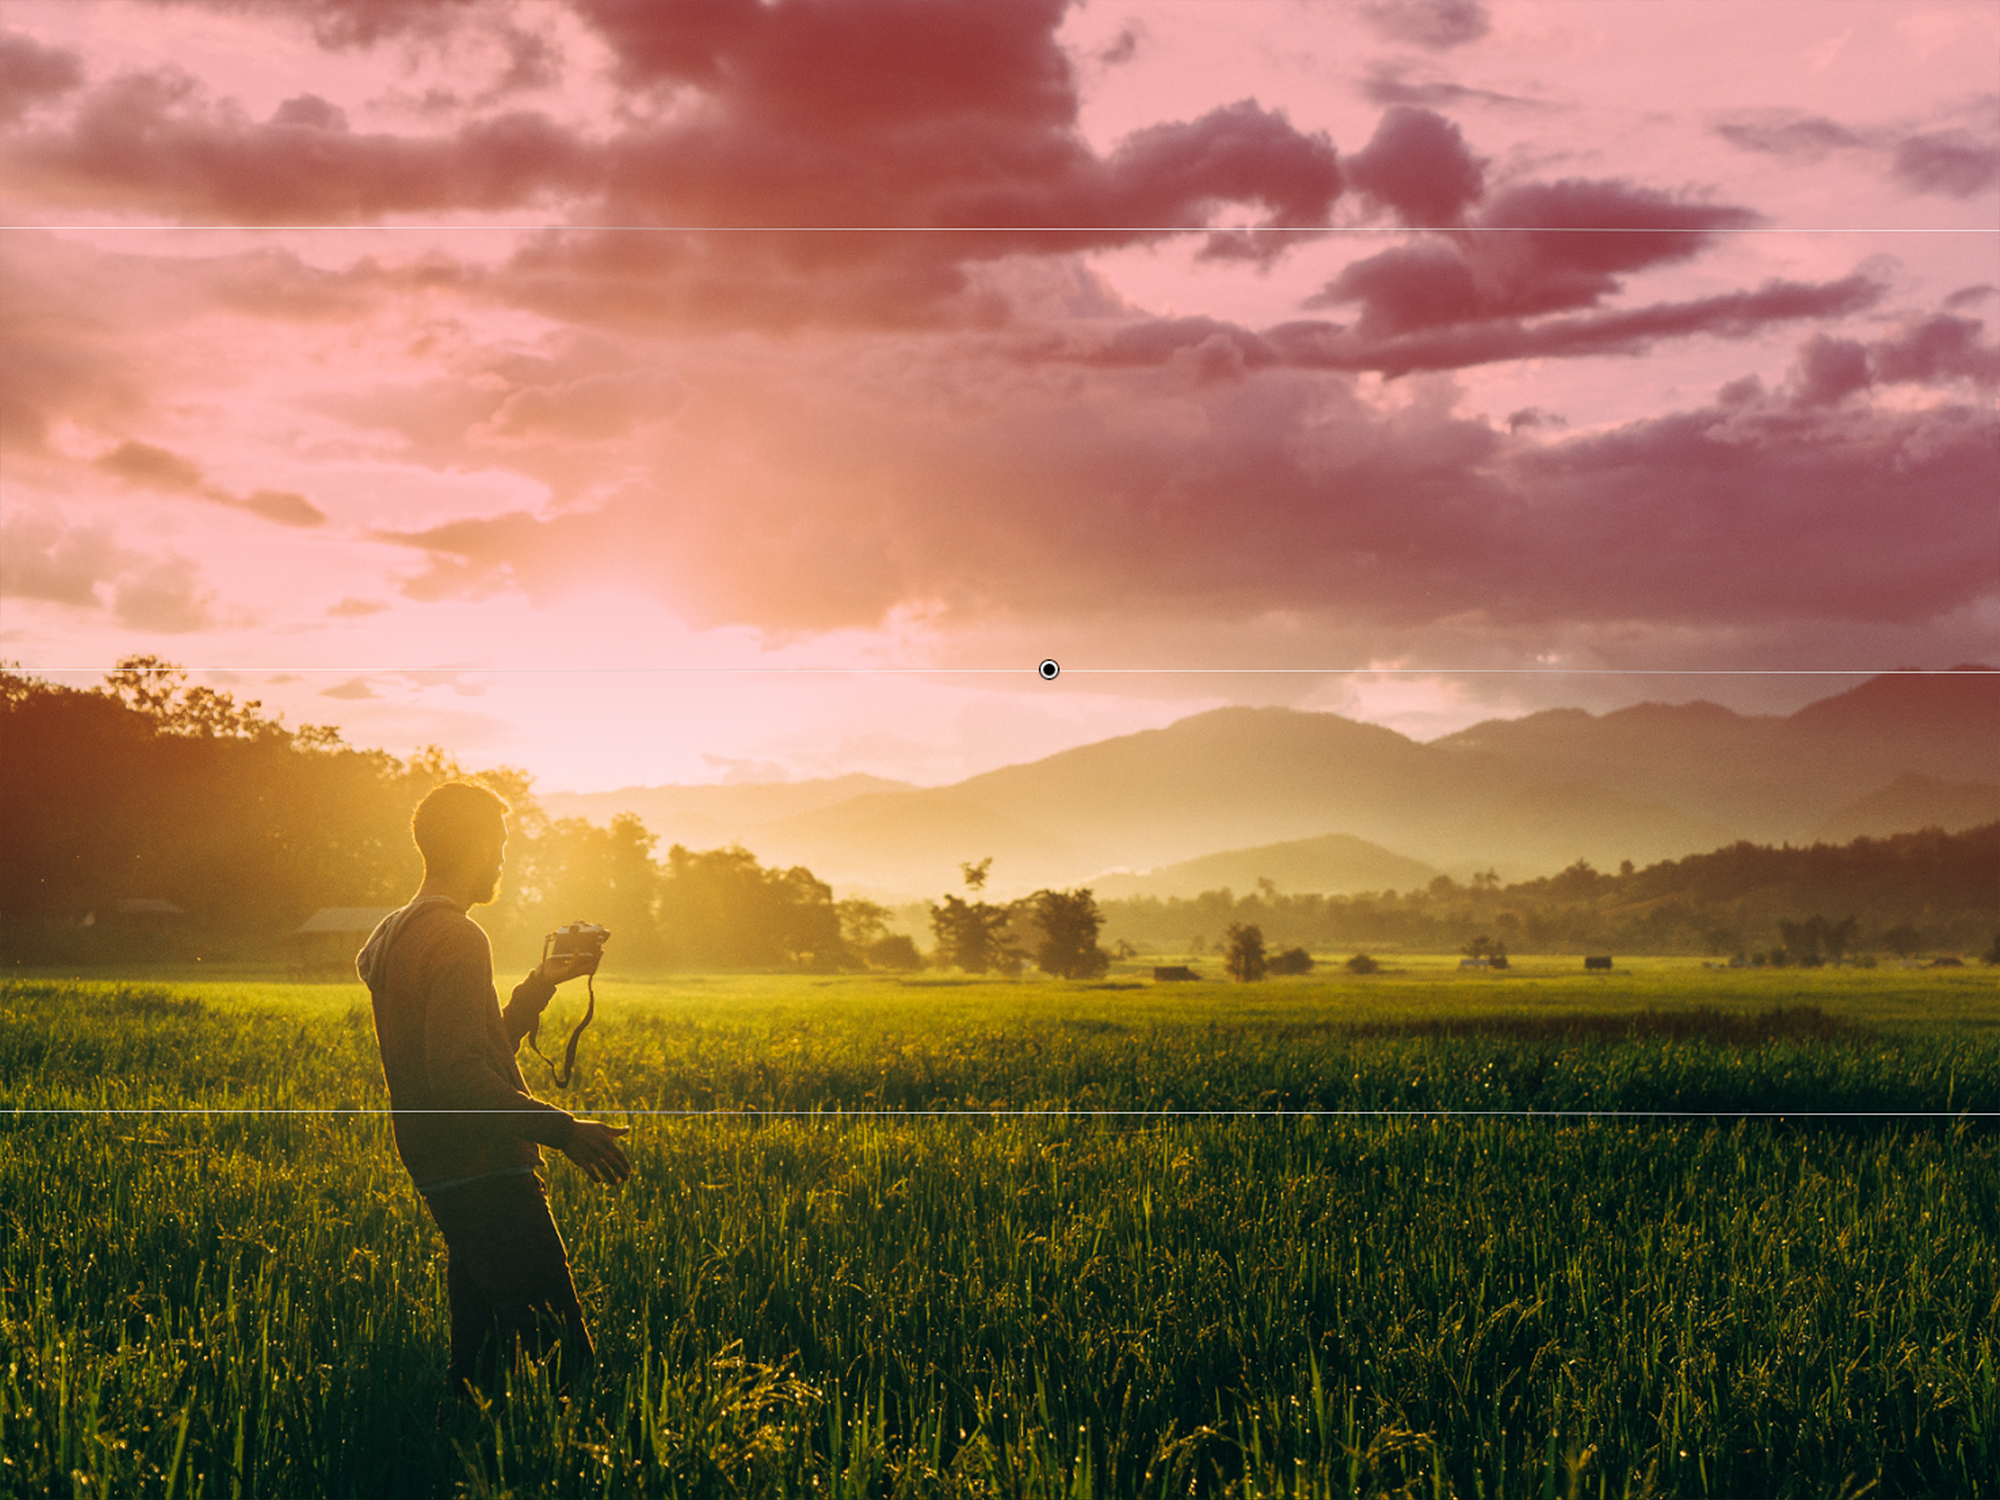
Its most common application is the enhancement of the sky in landscape photos. Here is an example of a relatively well balanced landscape photo with an interesting overcast sky holding a lot of promise for dramatic results.

Since our sky will be a local adjustment, we first process the photo globally. As a starting point, I applied the Vivid HDR Light preset from the Luxe Essentials Presets Collection.

After removing the rather strong applied vignette, I quite like the result because it has brought out strong blues in the sea and vivid cheerful greens at the bottom left of the frame. I find, however, the sky rather cold. I'd like to warm it up as well as make it more inviting and dramatic. I'll do this using the graduated filter. The graduated filter is accessed in the develop module, from the toolbox just below the histogram panel or by simply pressing the letter "m" on the keyboard.

The graduated filter menu has a huge range of effects. These effects are exactly the same as those available in the adjustment brush tool.

At the top of the menu, there are three tabs named "New", Edit" and "Brush". "New" is initially active by default. Press the new button whenever you want to create an additional graduated filter. As I hover above the photo, the mouse cursor becomes a cross. I start dragging from the top of the photo towards the sea and draw my graduated filter from start to finish (if the Shift key is kept pressed, motion is locked in the horizontal or vertical direction).

Pay attention to the numbering of the graduated filter’s features and you will understand what you need about the graduated filter's structure:
- Line 1: This is where I started dragging the graduated filter but it does not necessarily need to be at the edge of the photo.
- Line 2: The middle line of the graduation. In the area between lines 1 and 2, effects are applied 100% as determined by the sliders in the graduated filter menu.
- Line 3: The end line of the filter. Effects start at 100% strength at line 2 and gradually reach 0% strength at line 3. Near line 3 applied effects are very weak.
- Line 4: This is the handle. The handle is where we select previously drawn graduated filters when we enter the menu or where we choose between graduated filters when there is more than one of them in the same photo.
To demonstrate the strength and topology of effect application, we can activate the "Show Selected Mask Overlay" option just below the photo panel.

Notice that my filter covers a little more than the sky and for this reason I will need some corrections at the final tuning stage. Now is the time to adjust my effects. To demonstrate the power of the graduated filter, I have taken a rather heavy handed approach. It is always recommended to do this according to your personal artistic criteria. It is clear, however, that we now have a much more dramatic and interesting photo. The clouds provide an aggressive feeling, as if a storm might be approaching the coast.

There are a couple of things I can do to perfect my graduated filter. The first is to move all of it by grabbing its handle, adjust lines 1 and 3 to determine better start and finish points or rotate by grabbing and moving middle line 2. To complete these adjustments, I simply hover above each respective feature and grab/drag for the adjustment. The second and most important adjustment is erasing the graduated filter in unwanted areas - in our case the sea area and the land at the left side, just below the sky strip.
This next feature was introduced only recently in Lightroom CC and adds a lot of flexibility and value to the graduated filter tool. When the “Brush” tab is pressed, the bottom of the tool menu becomes exactly the same as the respective part of the adjustment brush so that effects are brushed in or out of our selection. Please see the Adjustment Brush Tutorial for further explanation on how to use this powerful tool. Below I have the red overlay switched on to demonstrate how the graduated filters have been removed from land and sea and are now only applied to the sky!

The "Edit" tab at the top lets me come back and do changes at any future point. In fact, this image has convenient geometry for two more graduated filters. One at the green triangle at bottom left where I made the foreground brighter and more detailed and one at the bottom right corner where I reduced exposure to increase focus towards the other parts of the photo. Here is the final result.

When shooting landscapes, be sure that you do not have blown out highlights in the sky. Blown out areas have no details to recover and the graduated filter (or any other tool) will be completely useless. In this case, a sky replacement in Photoshop may be the only realistic choice. So, if you were wondering how these landscape photos you admire sport those interesting skies, you now know a surefire process to achieve great results!
About the Author: Dimitrios Matsoulis is an engineer that studied in the UK and has an industrial automation and solar energy background. His love for outdoor activities and photography has naturally led him to photo editing. He uses Lightroom and Photoshop for his own photography as well as freelancing gigs. He lives in Greece and maintains his online presence via his personal photography blog, 500px, and Instagram.